KashFlow
The integration provides for sales to be uploaded to KashFlow as sales invoices against a "till" customer. It does not support the uploading of purchase invoices/expenses as it is assumed that the retailer will be inputting these directly into KashFlow.
For a default configuration, the instructions are fairly straightforward.
Prerequisites
- Create an account on KashFlow.com if you do not already have one (a free / trial account for testing is fine).
- Create a customer record on this account for sales (invoices) to be raised against. Instructions on doing this can be found here: https://www.kashflow.com/support/kb/cash-retail/ (step 2)
- Activate API access by following the instructions here: https://www.kashflow.com/support/kb/enabling-the-api/
Uploading invoices
-
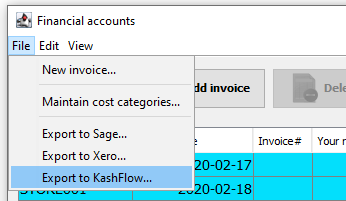
Open the Financial Accounts window in ProEPOS and select the File → Export to KashFlow option:
-
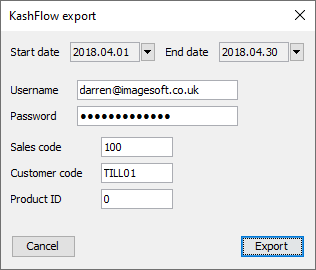
In the window that appears, enter the required settings (these will be automatically saved in the config, so only need be entered once):
-
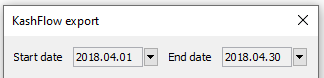
Select the start and end date of the period to upload:
-
Click the Export button.
-
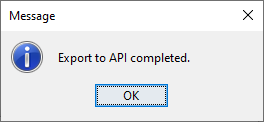
Once the upload is completed, a message is displayed:
-
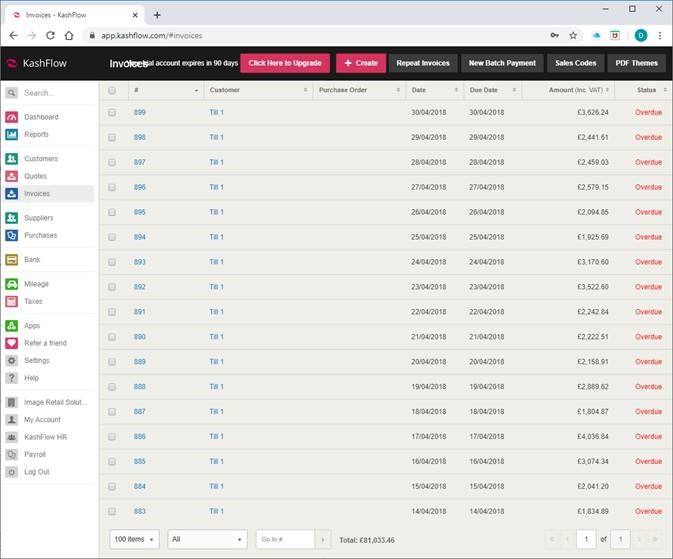
The invoices can now be viewed/edited in KashFlow:
Notes
The customer code of the EPOS/till "customer" must match the code entered into ProEPOS, or the upload will be rejected.
The product ID can specify a specific product code to assign sales against. Use "0" for no product assignment.
In KashFlow, it is possible to configure the API to require a different password to the login password for the account. In this case, the password in ProEPOS must match the API password (and not the login password). By default, both are the same.
An invoice is uploaded for each day, comprising a line item/entry for each VAT rate.
Once an initial upload has been manually actioned, subsequent uploads can be automatically performed as part of the overnight process. To enable this, simply set the config option KashFlow → AutomaticUploads to "true".