PiccoLink
Using the Piccolink Handheld Scanner
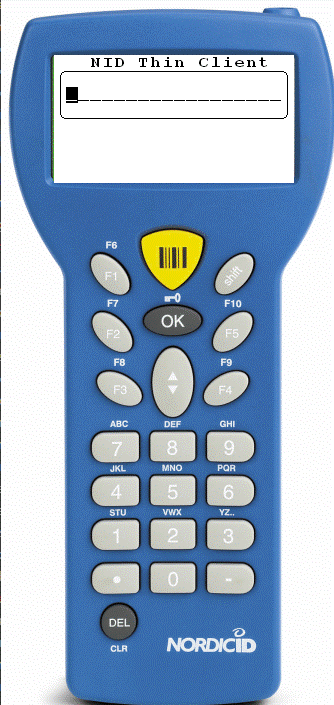
The Piccolink handheld scanner allows the user to walk around the shop with a handheld device that they can scan the barcodes of products and perform one of the following functions:
- A function to set/check prices.
- A function for generating an order (which includes support for split packs).
- A function for collecting a batch of barcodes that can be used when receiving goods.
- A function for checking/setting stock levels (i.e. stock taking).
- A function to print shelf edge labels for products.
- A function to print clearance labels foir products.
The Piccolink option works with the data live on the EPOS system so any changes applied via the handheld are automatically applied to the live data on the system.
You can secure the terminal so only allowed users can perform functions through the terminal, this just uses the standard ProEPOS employee ID and password. If this option is enabled you are presented with the login prompt.

If the option to login is not enabled or after logging in you are presented with the main menu.

To select an option from the menu use the up/down button and the OK button to select the menu option.
Setting the retail price
Choosing option 1 allows you to set the prices of the items in the shop.
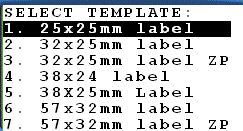
Subject to system settings the first thing you are asked for is to select the label to use to print the new label.
The next prompt is to scan the barcode of the item you want to set the price for.
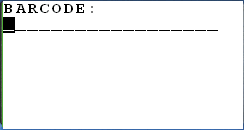
Scan the barcode of the product.
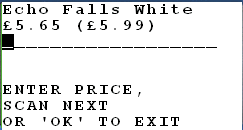
The price shown in the brackets is the MSRP price.
Enter the price is pence (e.g. 549 for £5.49) and press OK.
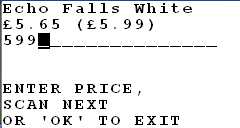
This will be instantly update the price of the product (if the option to favour SSP {store specific pricing} is enabled then it will update the SSP price) and print a shelfedge label out automatically.
You will then be taken back to the barcode prompt to scan the next product.

Clicking the OK button without scanning a barcode returns you to the main menu.
Ordering products
Choosing option 2 allows you to create a purchase order for items in the shop. The first thing you are asked for is to scan the barcode of the item you want to order.

Scan the barcode of the product.
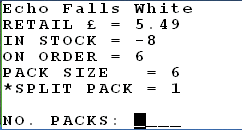
The display shows the current retail price, number of units in stock, the number of units currently on order, the pack size and if available the number of units in a split pack.
Enter the number of packs (or type . followed by the number of split packs) and press OK.
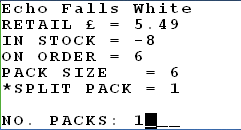
This will be instantly create or update an open order for the main supplier of the product.
You will then have an updated screen showing the updated on order details.
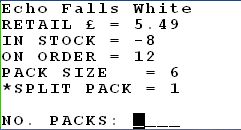
To move on to order another item click the OK button, you will then be taken back to the barcode prompt to scan the next product.

Clicking the OK button without scanning a barcode returns you to the main menu.
Batch collect
Choosing option 3 allows you to collect a batch of barcodes to add to a PO receive or a stock transfer. The first thing you are asked for is to scan the barcode of the item you want to add to this batch.
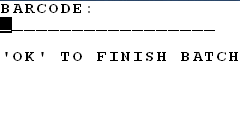
Scan the barcode of the product.
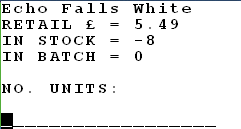
The display shows the retail price, number of units in stock and the current number of units in this batch.
Enter the number of units for this product and press OK.
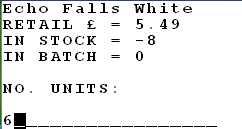
This will update the number of units in batch option with what you entered.
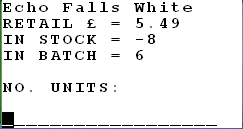
You can now simply scan the next barcode to move onto the next product in the batch.
If you click the OK button with no entry you will then be taken back to the barcode prompt to scan the next product.

Clicking the OK button without scanning a barcode will close off this batch and return you to the main menu.
Performing a stock take
Choosing option 4 allows you to perform a stocktake of the items in the shop. The first thing you are asked for is to scan the barcode of the item you want to set the stock level for.

Scan the barcode of the product.
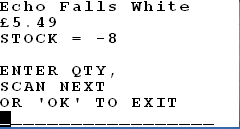
The display shows the product name, retail price and current stock quantity held on the system.
Enter the number of units counted and press OK.
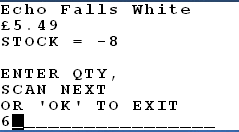
This will be instantly update the stock quantity of the product on the system.
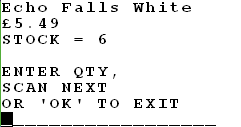
You can now scan the next barcode you want to set the stock quantity for.
Pressing the OK button will take you back to the barcode prompt to scan the next product.

Clicking the OK button without scanning a barcode returns you to the main menu.
Printing labels
Choosing option 5 allows you to print labels for the items in the shop.
Subject to system settings the first thing you are asked for is to select the label to use to print the new label.

The next prompt is to scan the barcode of the item you want to set the price for.

Scan the barcode of the product.
The label will be automatically added to the print queue, or if you have a Zebra label printer printed out.
You will then be taken back to the barcode prompt to scan the next product.

Clicking the OK button without scanning a barcode returns you to the main menu.
Clearance labels
Choosing option 6 allows you to print clearance labels for the items in the shop.
Subject to system settings the first thing you are asked for is to select the label to use to print the new label.
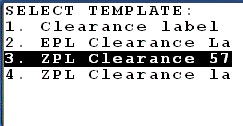
The next prompt is to scan the barcode of the item you want to set the price for.

Scan the barcode of the product.
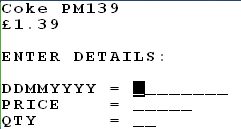
You will then be taken to the clearance label screen and prompted to fill in the expiry date, clearance price and quantity of labels to print.
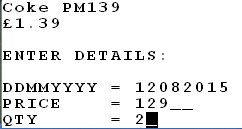
The label will be automatically added to the A4 print queue, or if you have a Zebra label printer printed out.
You will then be taken back to the barcode prompt to scan the next product.

Clicking the OK button without scanning a barcode returns you to the main menu.
Using our Android Piccolink Emulator
For those using Android HHT's supplied by us we do have available an app that emulates the Piccolink terminal and allows the use of the above Piccolink interface.